Thursday, 22 April 2010

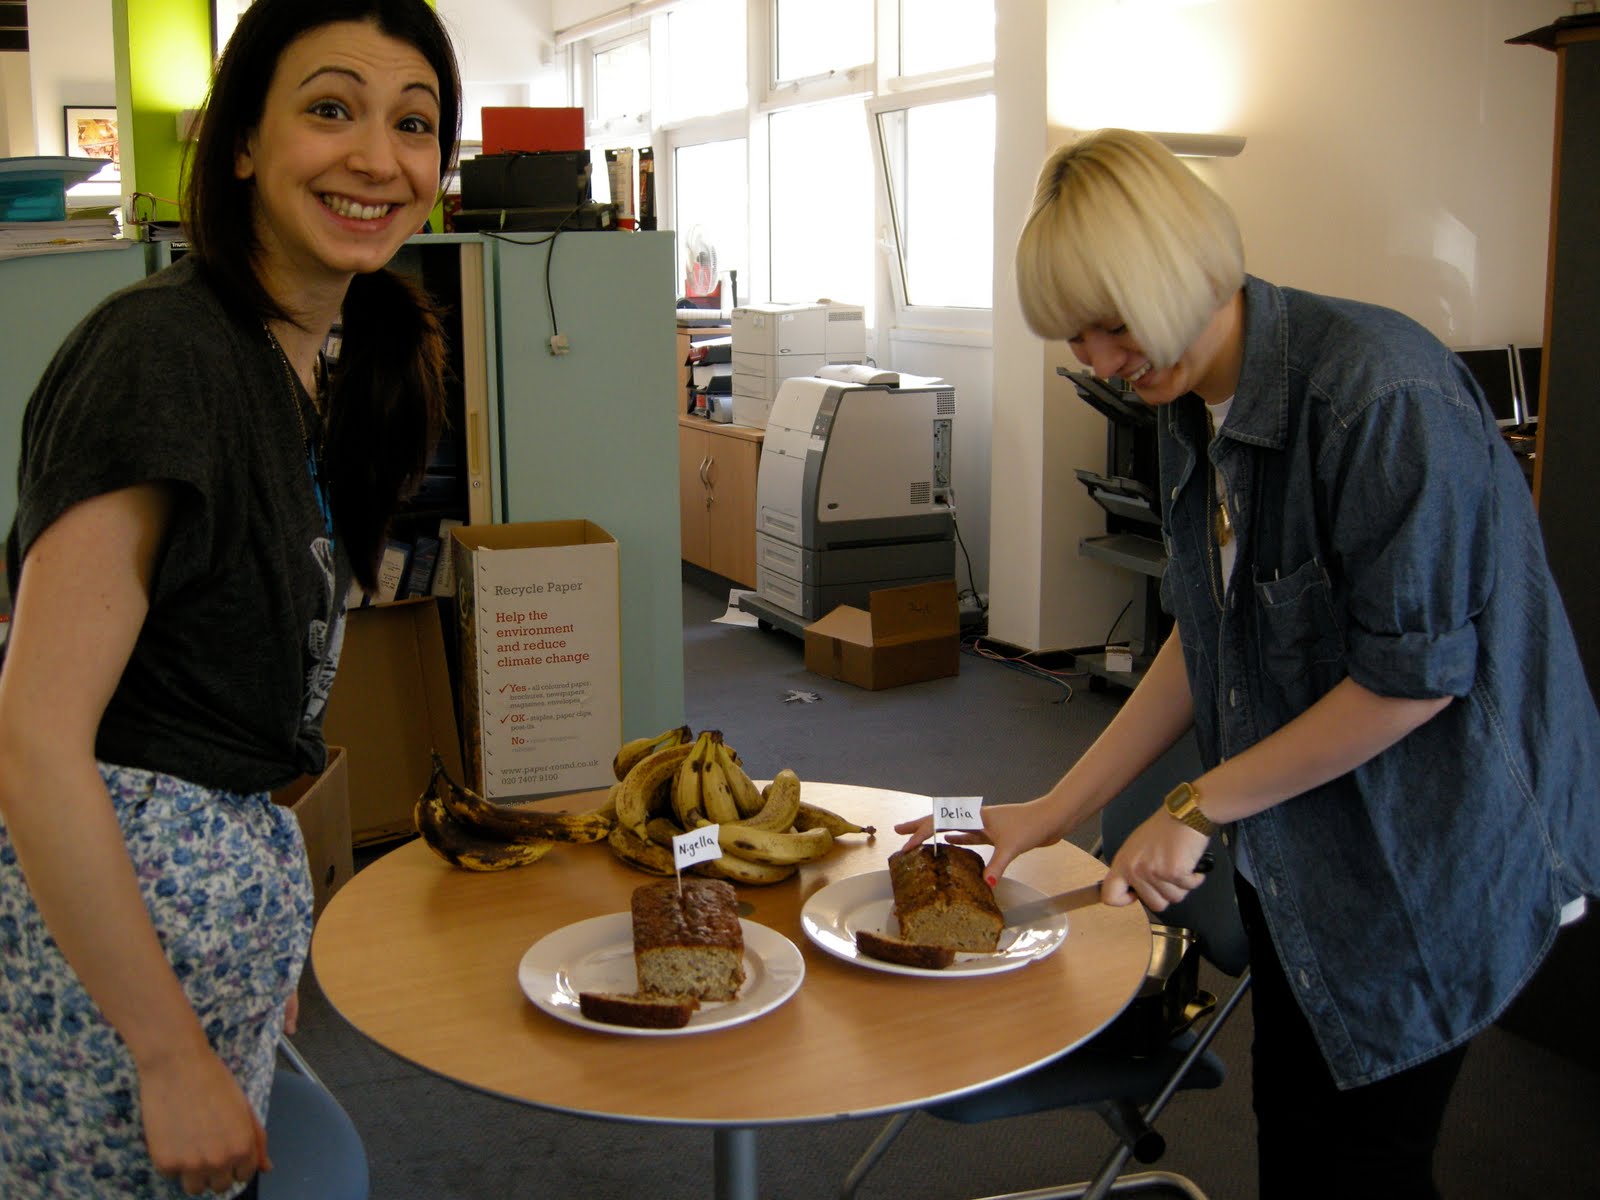
Nigella v Delia – who is more appealing?


In the office where I work we are lucky enough to get a delivery of free fruit every Monday, sometimes however there is quite a lot left uneaten. This week the fruit in question was the banana, so many bananas in fact that they were starting to take over the office!

The solution was clear, it was time for the Keston kitchen to step in, so with a bag full of over ripe bananas I headed home to decide on the best recipe to transform them into something tasty and stop them going to waste.

I had so much fruit to use up that I decided to test 2 recipes, there were many variations of banana bread/cake online but it didn’t take me long to reach the conclusion that I should go with the 2 big names in baking Delia Smith and Nigella Lawson.

Both recipes were quite straightforward to make – although I did have to make a quick call to Abbie (the offices resident baking expert) when I realised I didn’t have the wholewheat flour Delia’s recipe asked for. Nigella’s loaf was faster to make particularly as the batter was a lot sloppier and quicker to mix but the ingredients Delia uses (wholewheat flour and brown sugar) did appeal to me.

The next morning I returned to the office armed with the 2 banana loaves and enlisted the help of my workmates to judge which cake they preferred. As I work in market research I knew that they were clearly the best people for the task. They all stepped up to the mark and tasted both loaves.

Both cakes were definitely a success as there was very little left at the end of the afternoon. It was a close run thing but a few more people preferred the lighter, sweeter more banana taste of Nigella’s loaf. Personally I liked Delia’s it was denser but had a nice citrus flavour from the orange and lemon zest and I’d definitely like to try it again with the full amount of wholemeal flour. Also I think including walnuts in Delia’s banana and walnut loaf would probably do the recipe more justice!

In conclusion, you can’t really go wrong with banana cake!

Happy baking

Rachael x


Delia's Banana and walnut loaf

Ingredients:

350g bananas (about 4)

175g walnut pieces

pinch of salt

1 rounded teaspoon of baking powder (I used less than 1 tsp because of the self raising flour I added)

1 level teaspoon of ground cinnamon

110g plain flour

110g wholewheat flour (I used 55g plain and 55g wholemeal self raising flour as we didin’t have any wholewheat flour)

grated zest of 1 orange

grated zest of 1 lemon

110g of butter at room temperature

175g soft dark brown sugar

2 large eggs at room temperature

1 tablespoon of Demerara sugar

Method:

Pre-heat the oven to 180°C, then spread the walnuts (if you add them) out on a baking sheet and toasting them lightly in the oven for 7-8 minutes. After that, remove them from the oven to a chopping board, let them cool briefly, then chop them fairly roughly. Now, in a bowl, peel and mash 3 of the bananas to a purée with a fork, and peel and chop the other one into 0.5 inch (1 cm) chunks. Next you need to take a large mixing bowl and sift the salt, baking powder, cinnamon and both the flours into it, holding the sieve up high to give it a good airing, then adding the bran that's left in the sieve. Now simply add all the remaining ingredients (except the chopped banana and nuts) and, using an electric hand whisk, begin to beat the mixture, first on a slow speed for about half a minute, then increasing the speed to mix everything thoroughly and smoothly. Then lightly fold in the chopped banana and walnuts. You may need to add a drop of milk (I had to add quite a bit of milk because I used extra plain flour which absorbs more moisture than wholewheat flour) to give a mixture that drops easily off a spoon when you give it a sharp tap on the side of the bowl. Next pile the mixture into the loaf tin, level the top with the back of a spoon and sprinkle on the Demerara sugar. Bake in the centre of the oven for 1.25-1.5 hours, until the cake feels springy in the centre.

After that, remove it from the oven and let it cool for about 5 minutes before turning it out on to a wire tray. Then let it get completely cold before serving or transferring it to a cake tin.

Nigella’s Banana bread

Ingredients:

100g sultanas

75ml bourbon or dark rum (I used brandy)

175g plain flour

2 teaspoons baking powder

0.5 teaspoon bicarbonate of soda

0.5 teaspoon salt

125g unsalted butter – melted

150g sugar (I used caster sugar)

2 large eggs

300g banana (about 4)

60g chopped walnuts

1 teaspoon vanilla extract

Method:

Put the sultanas and rum or bourbon in a saucepan and bring to the boil. Remove from the heat, cover and leave for an hour if possible until the sultanas absorb a lot of the liquid, drain remaining liquid.

Pre-heat the oven to 170ºC

Put the flower, baking powder and bicarbonate of soda and salt into a medium sized bowl and combine well.

In a large bowl mix the melted butter and sugar and beat until blended, beat in the eggs one at a time and then add the mashed banana. With a wooden spoon, stir in the walnuts, drained sultanas and vanilla extract.

Add the flour mixture a third at a time, stirring well after each bit.

Scrape the mixture into a loaf tin and put in the oven for 1-1.25 hours. When cooked a skewer should come out cleanish. Leave in the tin on a rack to cool and eat thinly or thickly sliced as preferred.

Sunday, 18 April 2010

Tasty Tuna Italian Stylee

By Ceri x

A couple of months ago, Charlotte and I decided to have a slightly impromptu dinner party one Saturday evening. Charlotte whipped up her fantastic self-created Sausage pasta dish as a starter (an earlier post on the blog and well worth a look), and I was to provide the main course. I had it in my head that I had wanted to cook Tuna steaks for the previous couple of days. I had the perfect excuse as our good friend Tim was leaving London for more South Westerly climes (Bristol) so it called for an evening of wine, banter, wonderful Italian food and some smooth moves with a griddle pan.

Tuna as many people unfortunately know it, is that convenience fish you get out of a tin from the supermarket. The fresh Tuna steaks that you buy from the fishmonger make for an entirely different experience. When cooked well (my preferred way is with a very hot griddle pan leaving a lovely layer of pink through the middle of the steak so it is served medium rare) it is a delicious, meaty yet light fish with a really wonderful flavour that the canned version doesn't even come close to.

The recipe I chose was one I found online and adapted. This was an Italian style marinade including roasted peppers, capers, olive oil and lemon juice. As Charlotte previously mentioned, the Keston Kitchen rarely goes a week without the little wonders that are capers making an appearance. I love them and they go extremely well with fish of most kinds.

The recipe below is really easy once you master the cooking of the tuna. I served it on a salad of rocket, watercress, toasted pine nuts and roasted cherry tomatoes with a balsamic vinegar dressing, along with new potatoes in a garlic herb butter. It was a really tasty, fresh mediterranean style dish that we all fell in love with... even Rachie and she's not a fish fan.

It's worth a mention to be careful where you get your Tuna from to make sure it's responsibly sourced as it's an endangered species. I love this fish and think it's important to be aware of where it has come from when enjoying your dinner. It's always good to check with your fishmonger to make completely sure.


Ingredients: Serves 6
  • 6 8-ounce tuna steaks
  • 250 ml olive oil
  • 3 table spoons fresh roughly chopped parsley
  • 4 roasted peppers
  • 4 spring onions, sliced thinly
  • juice of 1 freshly squeezed lemon
  • 2 tablespoons capers
  • 2 tablespoons fresh oregano, minced or 2 teaspoons dried oregano
  • salt and pepper to taste

Preparation:

Mix the olive oil with parsley, roasted peppers, spring onions, 2 tablespoons lemon juice, capers, oregano, salt and pepper in a saucepan. Simmer over low temperature while stirring until completely mixed. Remove from heat and set aside.

Coat tuna steaks with remaining olive oil and lemon juice. Cover and let sit for 30 minutes. Preheat grill as hot as you can get it. Place tuna steaks on oiled grill and cook for about 3 to 5 minute per side or until done. Tuna steaks are done then the meat is opaque through the middle. Do not over cook tuna as it will go dry.

An alternative way (and my preferred method) to cook the Tuna is on a griddle pan- happily we have one in the Keston Kitchen. If you have one, heat the pan until really, really hot. Place the tuna carefully in the pan which should be non stick. Leave to cook on each side for 3 minutes for a medium rare steak- more for well done. I am a firm believer that the fish tastes better a little rare with a streak of pink running through the middle. It's also worth taking the fish off the griddle pan and placing the lines that run along the bottom to go in the opposite direction for that criss- cross effect.


The fish was then placed on a bed of the salad with a side of the new potatoes in garlic butter. We had a lovely Saturday evening dinner with delicious food and great people.

Belated good luck for happy times in Bristol Tim. xx

Monday, 12 April 2010

Later with Jules: earn some brownie points


lemon drizzle
chocolate brownies
strawberry cheesecake cupcakes

In the first ever Later with Jules, I explained that baking was entirely compatible with full time employment. I have since discovered that, as well as being compatible, the two are perfectly complementary. A slice of cake brightens the day of even the most overworked or underpaid. And let's face it, when it comes to the crunch, you're far more likely to be remembered for your chocolate brownies than for that innovative new filing system you designed...

I would like to provide you with a menu of options that all lend themselves nicely to the workplace.

Occasion 1: leaving a job.
For someone like me, who moves between jobs fairly frequently, perfecting the art of the leaving cake is essential. You should always leave on a high and, if you've failed to reach the peak of professional excellence thorough your day job, a cake can make your mark.

Now, as this is the last taste of your work your colleagues will have, I would play it safe. Better to go for an old time favourite than more experimental baking on this occasion (you could end up being remembered as 'that girl who made that strange cake'... a fate worse than death for a midnight baker). My personal view is that playing it safe means either:
a) chocolate (who doesn't love it?) or
b) lemon (entirely inoffensive, and light enough to tempt even the most weight conscious of colleagues)
Or, better still, both.

Which is exactly what I did when I left my last job. A delicious yet oh-so-simple lemon drizzle cake (every midnight baker should master this all-time-favourite) AND the chocolate brownie - a winner every time.

There a many variations on the chocolate brownie theme (all of which are infinitely better than the shop bought variety). This time I went for a Jamie version - which contains fruit and nuts - not strictly speaking 'classic' enough for a leaving cake but, as I made lemon drizzle as well, I felt confident that I would not alienate the nut allergic / fruit phobic folk that are sure to lurk in every office out there. Rich in flavour moist in texture... the brownie is a wonderful thing.

Occasion 2: the celebratory cake (birthdays / significant achievements / pregnancies etc)

It wasn't long into my new job that word got out about midnight baking and I was facing increasing pressure to produce the goods. Luckily, we soon had a 'thank f**k that's over' moment. After getting a big piece of work out of the way, an enormous slice of cake or stiff drink is definitely the order of the day, preferably both.


This time I went for the cupcake option, which is good because they can be shared around an office, but admittedly slightly more labour intensive. This time, reader, I made a fatal miscalculation of timing. Being a bit blasé about the possibilities of midnight baking, I foolishly went to the pub and returned beyond the midnight baking deadline. I then attempted to make double quantities of cupcakes AND pack for the easter hols. The result? I was icing cupcakes at 3.30am. This is NOT good. In fact, it is quite ridiculous. However, I happen to believe it that the happy cake filled faces in the office the next day made it all worthwhile, which may tell you something about my priorities in life.

I think it is fair to say that strawberry cheesecake cupcakes are by far the best cupcakes I have ever tasted. They are from the Hummingbird bakery book, and I have Miss Penny to thank for making them her signature dish, and inspiring me to emulate her success.

Subject: "I have baked a cake"
Click: "Reply all"
Before you know it everyone's
Stampeding down the hall

Exclamations of delight
as they happily tuck in
See, you can do something right
So lift up your chin

And hold your head high
You've made their day for sure
And off they trot back to their desks
Happier than before

Lemon drizzle cake

Ingredients

225g unsalted butter , softened 225g caster sugar 4 eggs finely grated zest 1 lemon 225g self-raising flour

FOR THE DRIZZLE TOPPING

juice 11⁄2 lemon 85g caster sugar

1. Heat oven to 180C/fan 160C/gas 4. Beat together the butter and sugar until pale and creamy, then add the eggs, one at a time, slowly mixing through. Sift in the flour, then add the lemon zest and mix until well combined. Line a loaf tin (8 x 21cm) with greaseproof paper, then spoon in the mixture and level the top with a spoon.

2. Bake for 45-50 mins until a thin skewer inserted into the centre of the cake comes out clean. While the cake is cooling in its tin, mix together the lemon juice and sugar to make the drizzle. Prick the warm cake all over with a skewer or fork, then pour over the drizzle - the juice will sink in and the sugar will form a lovely, crisp topping. Leave in the tin until completely cool, then remove and serve.


bloomin' brilliant brownies

ingredients

• 250g unsalted butter
• 200g dark Fairtrade chocolate (70% cocoa solids), broken up
• optional: 75g dried sour cherries
• optional: 50g chopped nuts
• 80g cocoa powder, sifted
• 65g plain flour, sifted
• 1 teaspoon baking powder
• 360g caster sugar
• 4 large free-range or organic eggs
• optional: zest of 1 orange
• optional: 250ml crème fraîche

dessert recipes | serves 20
Preheat your oven to 180°C/350°F/gas 4. Line a 25cm square baking tin with greaseproof paper. In a large bowl over some simmering water, melt the butter and the chocolate and mix until smooth. Add the cherries and nuts, if you’re using them, and stir together. In a separate bowl, mix together the cocoa powder, flour, baking powder and sugar, then add this to the chocolate, cherry and nut mixture. Stir together well. Beat the eggs and mix in until you have a silky consistency.

Pour your brownie mix into the baking tray, and place in the oven for around 25 minutes. You don’t want to overcook them so, unlike cakes, you don’t want a skewer to come out all clean. The brownies should be slightly springy on the outside but still gooey in the middle. Allow to cool in the tray, then carefully transfer to a large chopping board and cut into chunky squares. These make a fantastic dessert served with a dollop of crème fraîche mixed with some orange zest.


Strawberry Cheesecake Cupcakes
120g plain flour
1 1/2 tsp baking powder
a pinch of salt
40g unsalted butter, room temperature
140g caster sugar
1/2 tsp vanilla extract
120ml whole milk
1 egg
12 large strawberries, chopped into small pieces
200g digestive biscuits
For the cream cheese icing:
300g icing sugar (sifted)
500g unsalted butter, room temp
125g cream cheese, cold.
Makes 12 (big american style) or 18 normal cupcakes
Preheat oven to 170 (350 F, Gas mark 3).
In a small bowl mix together the flour, baking powder & salt. In a large bowl cream together butter & sugar until light & fluffy. On low speed add flour mixture and beat until you get a sandy consistency and everything is combined. Pour in the milk and vanilla extract and beat on a medium speed until everything is well mixed. Add the egg and beat for a few minutes to ensure the ingredients are well incorporated.
Divide the chopped strawberries between the paper cases. Spoon the cupcake mixture on top until 2/3 full and bake in the pre-heated oven for 20-25 mins, or until light golden and the sponge bounces back when touched. A skewer inserted into the centre should come out clean. Leave to cool slightly before transferring to a wire cooling rack to cool completely.
Roughly break up the digestive biscuits and process in a food processor until finely ground (or just bash)
To make the icing, in a large mixing bowl, beat the icing sugar and butter together with electric whisk on a med-slow speed until well mixed. Add the cream cheese and best until incorporated. urn speed up and beat until light and fluffy (at least 5 mins) Do not overbeat, as it quickly can become runny.
Spoon on top of the cupcakes and finish with a sprinkling of ground digestive. You can decorate with a slice of fresh strawberry if you wish.


Friday, 2 April 2010

The Easter Bun-off

by Charlotte x

As I delve deeper into my late twenties I begin to notice that my sweet tooth is often piping up, requesting desserts, chocolate delights and cake! I am a savoury tooth by nature and tend to cook savoury, salty dishes over baking sweet things. BUT, more recently I have decided that I need to be good at things like baking and pastry, in order to class myself as an OK creator of things in the kitchen.

Easter suddenly popped up, so a couple of days ago I decided to try my hand at hot cross buns, choosing a trusty Delia recipe to follow. They worked out rather nicely so I thought I would bake them again when back in the Shire for the four day Easter break. More to the point, I knew that once I got to mum and Big Al's there would be a bit of a competition on offer. Al is not often seen donning an apron but Easter time brings out his culinary side and every year he makes his buns in a very precise, delicate manner with a face full of concentration.

So, he got up at 9 and made his buns, using the Chorleywood method, something I have never heard of which involves putting viatmin C in the recipe to decrease the time you leave the dough to rise for, a method widely used in the UK bread making industry. My sister and I used Delia; I forgot to put the teaspoon of sugar with the water and yeast, so I then had a small strop because I thought they would not rise, complained about the temperature of my mum's house (not a good excuse as by this point Al's buns were the size of melons) and then decided it would all be fine as I could make 8 instead of 10-12 so that they were still of meritable size.

Is this cheating? Al says yes. Is vitamin C cheating? I say yes.

Two hours later and all was rosy. We glazed our buns in harmony and sat down to tea and a bun - half a bun of each recipe.

Al's buns: best served with a knob of butter.

Charlotte's buns: best served with a Haliborange.

Ingredients:
2 oz (50 g) caster sugar, plus 1 level teaspoon
1 level tablespoon dried yeast
1 lb (450 g) plain flour
1 level teaspoon salt
1 rounded teaspoon mixed spice
3 oz (75 g) currants
2 oz (50 g) cut mixed peel
1½-2 fl oz (40-55 ml) warmed milk
1 egg, beaten
2 oz (50 g) butter, melted
For the glaze:
2 level tablespoons granulated sugar

Method:

First stir the teaspoon of caster sugar into 5 fl oz (150 ml) hand-hot water, then sprinkle in the dried yeast and leave it until a good frothy 'beer' head forms.

Meanwhile sift the flour, salt and mixed spice into a mixing bowl and add the remaining 2 oz (50 g) of sugar, the currants and mixed peel. Then make a well in the centre, pour in the yeast mixture plus 1½ fl oz (40 ml) of milk (again hand-hot), the beaten egg and the melted butter. Now mix it to a dough, starting with a wooden spoon and finishing with your hands (add a spot more milk if it needs it).

Then transfer the dough on to a clean surface and knead it until it feels smooth and elastic – about 6 minutes. Now pop it back into the bowl, cover the bowl with a lightly oiled plastic bag, and leave it in a warm place to rise – it will take about an hour to double its original size.

Then turn it out and knead it again, back down to its original size.Divide the mixture into 12 round portions, arrange them on the greased baking sheet (allowing plenty of room for expansion), and make a deep cross on each one with a sharp knife. Leave them to rise once more, covering again with the oiled polythene bag, for about 25 minutes.

Meanwhile pre-heat the oven to gas mark 7, 425°F (220°C).Bake the buns for about 15 minutes. Then, while they're cooking, melt the sugar and 2 tablespoons of water for the glaze over a gentle heat and brush the buns with it as soon as they come out of the oven, to make them nice and sticky.


Monday, 29 March 2010

Simply the Nest


Here on the Keston kitchen blog we like to provide a wide range of recipes - from the simple and straightforward to ones that are far more complicated and challenging.
So brace yourselves - this recipe is aimed at the most skilled and experienced chefs out there - yes, it's the Easter nest!

I have been making chocolate nests every Easter since I can remember and this year is no different. I have concluded that shredded wheat is definitely the tastiest (and most nest like) cereal to use, and that Bournville (40% cocoa) chocolate is the best because it is not too sweet or too bitter.


The ingredients below make 12 Easter nests:

Ingredients:
5 large Shredded wheat
200g Bournville chocolate
2 or 3 mini eggs per nest (a 100g bag of Cadbury mini eggs contains about 33 eggs)
12 paper cases


Method:
  • Melt the chocolate by placing it in a mixing bowl over a pan of boiling water, stirring until runny
  • Then turn off the heat and add the already crushed Shredded wheat - keeping the bowl over the hot water keeps the chocolate warmer and so makes it easier to combine it with the cereal. You can add less than 5 Shredded wheat if you want them to be more chocolatey
  • Spoon the mixture into the paper cases and stick the mini eggs into the nests before the chocolate sets
  • Place the nests in the fridge to speed up the setting process so you can eat the sooner
Enjoy!

Saturday, 27 March 2010

I heart Italia: The Courgette Pasta


by Charlotte x

In our house this dish is known simply as ‘the courgette pasta’. A simple dish, of delicate flavours that we all love and devour on a regular basis.

I have this thing where I love vinegar, almost anything with a vinegar kick gets me excited, for example; Pickled Onion Monster Munch, Cornichons, Picked Onions, Salt & Vinegar Discos, Picked Cabbage… the list goes on. Anyway, this dish gets the kick that I know and desire from the cider vinegar and the capers. I’d like to take a moment to talk about the caper, an edible, Mediterranean bud from the spiny caper bush, something that right now – we cannot get enough of. It’s great in pasta dishes, salads and always makes me think of Italia.

Back to the recipe. Not much to say really, besides the fact that it is a visual feast of freshness.

And, when fed to friends it always gets some praise, a big smile and maybe a little wince – a good wince – a vinegar wince. Happy wincing.

For a serving of 4 I suggest using the following Ingredients:

3 courgettes, sliced into thick rounds and then cut each round into 3 batons

250g tomatoes, cherry or whatever your favourites are

1 garlic clove, crushed

1 tsp chilli flakes

2-3 tbsp capers, depending on how much you love them

2 tbsp cider vinegar

3 tbsp olive oil

1 tsp dried oregano

350g pasta, I like linguine or wholewheat tortiglioni

 Method:

1.Cut up the courgettes and place in a sieve/colander. Salt and leave for 15 minutes.

2.Meanwhile, cut the tomatoes and squeeze them, putting juice and tomatoes into a mixing bowl. Add the garlic, chilli flakes, capers, vinegar and oil to the bowl and leave to marinate.

3.Put the pasta onto cook.

4.Heat some oil in a large frying pan and throw in the courgette batons and the dried oregano. Cook for 6-8 minutes over a low/medium heat.

5.Throw in the tomato mix and cook for a couple of minutes while you drain the pasta.

Serving suggestion: in wide rimmed, rustic bowls with salad and friends on the side. Chilled prosecco should accompany the piatto del giorno… 

Sunday, 14 March 2010

Later with Jules: Red Velvet Cupcakes


Oh la la: red cakes xxx

Just as I was thinking it was high time for some midnight baking, March arrived and with it the birthday of Miss Lottie Shaw. More than a good enough excuse to stay up late one Thursday night preparing for the big day. We were to celebrate on a Friday night in Soho, so I felt the need for something exciting. I pulled down the trusty Hummingbird cookbook and what did I find: bright red cupcakes. Fun, pretty, out-of-the-ordinary, just like Lottie.


Now, this is the first time an ingredient such as food colouring has appeared in the Kitchen, the Keston ladies preferring our food au naturel, but these cakes came so highly recommended that I made and exception. Indeed Charlotte, a woman of high standards and healthy food snobbery, raved about them so much when Rachy made them last year that I knew they were worth a try. If they get a Charlotte endorsement, they gotta be good. The girl got taste.


Having bright red cake mixture in your baking bowl at midnight is very exciting. It takes you back to your youth: the more colourful the food the better. For me, it evoked fond memories of sitting in Rachy's mum's kitchen at a young age smothering rich tea biscuits with bright green icing and sweets (post to follow Midnight baking: the early years).


Back to the cakes. While you wait for the little red delights to bake, you make the delicious cream frosting. This just adds to the colour extravaganza: it looks like an ordinary cake, but as you bite through the cream icing you encounter a red surprise.

As these cupcakes are so pretty, I thought it fitting to present them in a box covered in cupcake wrapping paper. Damn, sometimes it good to be a girl.


When handed out to Lottie's lovely friends who had arrived to celebrate her birth, they were a resounding success. This is the real surprise of these cakes: they are delicious! They have an amazing flavour (containing both chocolate and vanilla) and a rich dense texture. Yum.


So, to inject a bit of colour into your baking, go for the red velvet.


  • Red Velvet Cupcakes

    • 150g plain flour
    • 10g cocoa powder
    • Half tsp bicarbonate of soda
    • Half tsp salt
    • 120ml buttermilk
    • 1 1/2 tsp white wine vinegar
    • Half tsp vanilla extract
    • 20 ml red food colouring (preferably Dr Oetker)
    • 60g butter at room temperature
    • 150g caster sugar
    • 1 large egg


    Cream-cheese frosting

    300g icing sugar, sifted

    50g unsalted butter, at room temperature

    125g cream cheese, cold


    If you want to make big fat american cupcakes, use muffin cases (it makes 12). Or makes about 18 English cupcakes.


    Preheat the oven to 170C/325F/gas mark 3. Line a 12-hole cup cake tin with cases.


    In a large bowl, whisk together the flour, cocoa, bicarb and a pinch of salt. In a mug, mix the buttermilk, vinegar, vanilla and red food colouring.

    Beat the butter and sugar together until pale and fluffy. Beat in the egg a little at a time. Mix in a third of the flour mixture, followed by half the buttermilk mixture, then another third of the flour, the rest of the buttermilk and finally the last of the flour mixture.

    Divide the mixture between the paper cases. Bake for 20 minutes, until risen and springy - don't overcook them.

    Cool on a rack.


    When the cupcakes are cool, spoon on the cream cheese frosting:

    Beat the icing sugar and butter together with an electric whisk. Add the cream cheese and beat until incorporated. Continue beating for 5 mins until light and fluffy. Do not overbeat (it will can quickly become runny)