Showing posts with label Fancy Food For All. Show all posts

Tuesday, 20 August 2013

A Taste of Tahiti


Poisson cru au lait de coco

My first taste of poisson cru on the island of Moorea. Rum Punch in the foreground.

 As if my holiday on an island in the Pacific wasn't paradisiacal enough, my host approached me with concern to inquire whether I minded eating a lot of fish.   Fresh and delicious, fished straight from the ocean and cooked on an open fire.  Or alternatively not cooked at all; the Tahitian national dish, Poisson Cru, is a ceviche-like dish made from raw fish, preferably tuna.

UM hello did I mind??  I nearly fell of my deckchair in delight.

I feel it necessary to share the joy of this simple dish.  Unlike ceviche it does not cook in the marinade - the aim is to serve is raw.  So you need a really fresh, good quality catch, sustainably sourced of course.  It melts in the mouth and is good for the body and soul.  Take a taste and be transported to the paradise islands of French Polynesia.

Best served on a private island in the Pacific, with fish freshly caught by beautiful Tahitian men, with coconut milk freshly pressed from the laden palm trees, sitting on a beach overlooking a blue lagoon, at sunset.  Failing that, a dose of imagination is required.

Mass coconut shredding in preparation for Flo's wedding feast
Beautiful men fishing off the reef (le récif) into the Pacific
Poisson cru au lait de coco
(Raw fish in coconut milk)

With many thanks to Flo's Aunty for sharing her recipe.  (NB given age-old recipe and lack of scales on deserted island, this recipe is less exact than usual and quantities are approx - don't feel constrained by them)

Ingredients:
Serves 6
500g fresh, sustainably-sourced tuna
3 tomatoes
1 cucumber
1 clove garlic
1/2 onion
coconut milk (2 tins but may not need all)
To season: lemon or lime (1 or 2 small ones), salt, pepper

Method:

1. Cut the tuna into cubes and rinse in salted water (pref. the sea!)

2. Dice the tomatoes and cucumber. Finely slice the onion and crush the garlic.

3. Season the coconut milk with salt, pepper and lemon/lime juice. (So if you don't have a bowl of fresh milk pressed straight from the day's windfall, I'd advise putting 1 1/2 tins in a bowl and seasoning.  You can add the rest later if you think it needs it).

4. Add all the veg and finally the fish to the coconut milk and serve immediately (you don't want to allow the fish to 'cook' at all in the lemon/lime juice).

Ma'a (aka food): Délicieux

by Jules 


Sunday, 29 January 2012

Rhubarb crème brûlée


Rhubarb crème brûlée.


By Jules


March is a tricky month for the foodie. Trapped in 'The Hungry Gap'; the time of year when fresh fruit and veg are thin on the ground, the seasonal chef is found scratching her head, scouring the store cupboard for ingredients. Cue the arrival of robust rhubarb - the bright pink stems shoot through the hard earth to brighten up these bleak winter days.


And with the arrival of rhubarb comes the inevitable craving for custard. This Christmas, the new toy in the Keston Kitchen was a a chef's blow torch. It didn't take long to conclude that this very British flavour combination could add a twist to an old French classic. The divine Creme Brulee (a posh name for egg custard with a crunchy sugar crust) is fun to make and even more fun to eat: firing the sugar then tap taping the crust with the back of your spoon to delve into the cool creamy custard. The hit of tangy pink rhubarb is the surprise hiding beneath.


This recipe requires a bit of patience and attention. I know to my cost that the cream can quickly bubble over and, if it is too hot when you add it to the egg, it will have a curdly consistency rather than the longed-for creaminess. But the treat is worth it in the end. And if you don't have a blow torch, you can get similar results by putting the custards under a very hot grill to burn the sugar crust.


What better way

to spend a cold winter's day

than making creamy and delicious

rhubarb creme brulee?


Ingredients


4 stems of rhubarb, cut into 1cm slices.

4 egg yolks

450 ml double cream

10 tablespoons caster sugar

1 vanilla pod (sliced lengthways and seeds scraped out)


4 large ramekins or 6 smaller ones.


Preheat the oven to 180C and put the rhubarb in the roasting tin and sprinkle over 4 tablespoons of the sugar to coat. Roast until soft (20-30 mins). Divide between the ramekins and chill.


Whisk 4 tablespoons of sugar and egg yolks together until pale.


Heat the cream and vanilla seeds over a medium heat until the cream bubbles at the edges. Be careful not to overheat!


Gently pour the warm cream into the egg mixture whisking until smooth. Pour back into the saucepan and stir over a low heat for 20 mins until the custard is thick. This needs patience and attention - you don't want the cream to boil over or burn.


Pour into the ramekins and chill for 6 hours or overnight.


Sprinkle the remainder of the sugar over the custards and - the fun bit - fire with a chef's blow torch.


Alternatively place under a very hot grill until glazed. Allow the crust to cool and harden for a moment then serve to your guests who are eagerly waiting to get cracking.


Sunday, 12 June 2011

Green Gazpacho


Summer Soup: fresh and green as pastures new

Selecting the starter for Supper Club numero dos was a drawn-out affair. I was feeling despondent after weeks of making roasted vegetable terrines that did not set, when Charlotte stumbled across this recipe from Plenty by Ottelenghi. It ticked all the boxes: seasonal, light and a perfect match for Rachael's delicious ricotta and sun dried tomato stuffed chicken which would be making its debut as our Main.

A somewhat risky choice to feed a room of strangers (cold soup?!) but the guests lapped it up and cried for more (they didn't get it, we were carefully controlling portions so that they had room for the main, trio of desserts and exquisite macaroons we had in store).

The reason for its success? The nuts and basil give it a rich, full flavour; the chilli gives it a kick. And if you put that combination of delicious green things in a glass it can only lead to one thing: a taste fresh as a summer's day.

I served the soup with croutons made from homemade soda bread. Baking your own bread is a bit extravagant for croutons and not strictly necessary, but that's just how we roll in the Keston Kitchen.

Enjoy

Jules xxx

Green Gazpacho
(Serves 6 - big portions)

2 celery sticks (including the leaves)
2 small green peppers, deseeded
1 large cucumber (weighing about 350g), peeled
3 slices stale white bread, crusts removed
1 fresh green chilli
4 garlic cloves
1 tsp sugar
150g walnuts, lightly toasted
200g baby spinach
25g basil leaves
10g parsley
4tbsp sherry vinegar
225 ml olive oil
40g Greek yoghurt
250g ice cubes
2tsp salt
white pepper preferably, but black works too)

Croutons:
2 thick slices bread
4tbsp olive oil

To make the croutons, preheat the oven to 190C. Cut the bread into 2cm cubes and toss them in the olive oil and a bit of salt. Spread on a baking sheet and bake for about 10 mins or until golden and crisp. Remove from the oven and allow to cool.

Roughly chop up the celery, peppers, cucumber, bread, chilli and garlic. Place in a blender and add the sugar, walnuts, spinach, basil, parsley, vinegar, oil, yoghurt, water, half the ice cubes, salt and pepper. Blitz the soup until smooth.
(n.b. our blender is small so I had to do it in batches).

Lastly, add the remaining ice and pulse once or twice to crush it a little. Serve at once with the croutons.


Saturday, 2 April 2011

Courses for Sauces


Last year I received a very exciting present, a mornings course at Leith's cookery school in West London. I enjoyed it immensely and was lucky enough to get to go on another one as my Christmas present! I went on the second course earlier this week, this time I opted for the sauces workshop as I thought that was an area of cooking that I needed to learn a lot more about. I hoped the course would provide me with a good grounding in making basic sauces and a better understanding of the different types that can be made.

I was not disappointed! The course was a full day and they really packed everything in. The day started with a 1 hour demonstration where we were explained to about making stock (I learnt something new in the first 5 minutes - that brown stock is made from bones that have already been cooked and white stocks from raw bones). The chef also talked about the key mother sauces (e.g. white sauce) and the daughter sauces that can be made from them (e.g. cheese or bechamel). He then demonstrated making a port sauce, a creamy sauce and hollandaise.

We were provided with booklets which contained the instructions on making all the sauces covered during the workshop and more. We were then let loose on the kitchens, there were 16 of us and 2 teachers.
One of the reasons you get through so much on the course is the team of people who are busy in the background doing your washing up and delivering the ingredients to your bench as you require them.
The first thing we turned our hand to was making a jus, we reduced white and red white, browned vegetables and chicken wings and put them into the wine along with some chicken stock. We then left our pans to gently bubble away for a few hours, skimming the fat off the surface regularly.
Meanwhile we made a Mornay sauce with Gruyere and Parmesan and then got started on our lunch - a chicken breast with a creamy tarragon sauce which was delicious.
After lunch we strained our jus and left it on the hob to reduce.
During the afternoon we made mayonnaise (which if you have patience is very easy to make but disturbingly, pretty much the only ingredients are egg yolk and veg oil), basil pesto and a creme anglaise (custard).

Overall I thought it was a great day and would definitely recommend it to other people. Although pricey you get to use wonderful ingredients and come away with the confidence to do it all again by yourself.

Back in the Keston kitchen i am very keen to try out some of my new skills (and the other ladies want to learn too)! I have made pesto before and tried my hand at white and cheese sauces before with moderate success but the stuff I learnt about stocks, jus and emulsions will be invaluable.

The creme anglaise was put to good use a couple of days later when our friends from round the corner (Ady's ladies) came for dinner. Of course we needed something to go with the creamy custard so I made an apple tart. If you want to have a go at creme anglaise yourself, instructions are below. The ingredients listed make a very light, runny sauce. If you want it thicker just add more yolks and use full fat milk or cream. For thick set custard the chef recommended 6 yolks and a pint of double cream!

Creme Anglaise

Ingredients:
1/2 pint semi skimmed milk
1 vanilla pod or a few drops of vanilla essence
2 egg yolks
1 tbsp caster sugar (plus a bit more if you fancy)

Method:
Scrape the seeds out of the vanilla pod, mix the seeds on your chopping board with a sprinkling of sugar - this stops the seeds clumping together. If you opt for vanilla essence add it at the end.
Place the sugary seeds, empty pod and milk in a pan and bring slowly to the boil. If you fancied chocolate custard, add 30g dark chocolate at this stage.
Beat the egg yolks in a a bowl with 1 tbsp of caster sugar. When the milk has just started to bubble take it off the heat (remove the vanilla pod) and pour it, a little at a time into the bowl with the egg yolks. Adding slowly to start with will help prevent the eggs being cooked and scrambled by the hot milk.
Once mixed well, return it all to the pan and put it back on the hob. Stir continuously over a low heat for a few minutes until the mixture thickens. Do not let it boil. The key signs that it is thickening, are steam coming off the mixture, the bottom of the pan will begin to feel velvety and the mixture will coat the back of your spoon.
Immediately strain the sauce into a cool bowl, straining will remove any unwanted lumps off egg or pieces of vanilla pod and decanting from the pan straight away prevents it cooking further.
To finish add the vanilla essence (if you didn't use vanilla seeds) or you could try adding orange zest or alcohol (like calvados). I also added a bit more sugar.
Eat hot or cold, with fruit, apple pie or crumble or just on its own!

Rachael x

Monday, 21 March 2011

Entertaining

Duncan Ackery chats food at the V&A

Lindsay (honorary Keston Kid) and I recently went to hear Duncan Ackery, chef and restauranteur, chat at the V&A Reading Rooms. They mentioned that space would be tight, and it was. There was just enough room for approximately twenty girls plus one token man cram in and listen to Duncan talk about cooking and entertaining. Not only was he talking but he was cutting things up, mixing ingredients, salting vegetables and handing them round for us to taste. Yes we were in for a good night.

Duncan had been to Borough Market that morning to pick up some seasonal items to discuss with us, the whole preface being that when entertaining, it is not just about the food but about having fun with your friends, so choose recipes well, get amazing fresh ingredients, make some stuff ahead and have a good time. In a fairly brief fashion here are some great things to make in spring:

  • Mackerel pate served with rhubarb and blood orange compote on top (cook the rhubarb for 3-4 minutes so that it holds its form)
  • Mackerel (raw) marinated in honey and mustard - this is good
  • Really good mozzarella torn up and served with olive oil, lemon zest and sea salt (fleur de sel is a great garnish salt)
  • Goats cheese and beetroot
  • Radishes halved and salted
  • Roasted fennel - roasted in a pan
  • Mussels cooked with smoked french garlic, leeks (pre blanched to take away a little of the strong flavour) and white wine
  • Asparagus - blanched for 2 minutes in just water, served with clarified butter (gently warmed butter which separates into two layers - use the top layer only) and salt
  • Radicchio salad - you need a fairly strong dressing, like blue cheese or something lemony

Chinese Pork Belly - recipe in full. Duncan is passionate about Asian food, this recipe in particular, and so was everyone else by the time he'd finished speaking:

- Take a piece of pork belly and take off the skin (leave the fat)

- Chop the pork into thumb size pieces

- Boil the pork in water for 3 minutes and drain

- Heat some nut oil in a wok until is is really hot (I used sesame oil)

- Add in a dessert spoon of sugar, let it caramelise (turn to liquid) and then add the pork

- Add about 3 cups of Shaohsing rice wine, soy sauce, 3-4 broken up star anise and a couple of cinnamon sticks

- If you want some liquid then add stock at this point

Serve with rice and seasonal veg - like purple sprouting, cooked separately in a wok with nut oil and garlic. Add a tiny bit of stock and cover to allow the greens to steam briefly.

This is easy and quick and really fresh tasting. I got all the ingredients from my local oriental supermarket, including fortune cookies!

Tips:

  • Always have potted shrimp in the freezer - I've never used it so can't say much more. Needless to say I will buy some soon and give it a whirl...
  • Chicken thigh fillet is SO much better than breast - it has tons more flavour and is great for frying
  • Make use of good local beer, which is great for cooking - Fuller's Honey Dew was recommended

Tuesday, 23 November 2010

Roast Duck with Plum and Russet Confit*


A visit by the parents for Sunday lunch is a potentially daunting experience. Especially if you have grown up with consistently delicious Sunday lunches produced in a seemingly effortless manner. So when the folks arrived for a weekend with their London-based sprogs, and treated us to a West End show, I knew I had to impress.


Error number one was assuming they would be late, and that I'd have time to nip to the butchers, before they arrived on Saturday. When the Ellis' broke with tradition and arrived on time, I was taken a back. Therefore I resorted to popping to the Co-op on Sunday morning to find, to my horror, that they'd run out of free range chickens. I threw caution to the wind and bought a freedom-food endorsed duck. Never cooked it before, and a wee bit pricey, so the pressure was on.

I discovered to my delight that a duck is such a fatty little blighter that you barely need to do anything to prepare it for a roasting. Just rub on a bit of salt, prick the skin to allow the fat to drain off, and ensure it is raised (either on a wrack or on top of some crumpled silver foil in a roasting tin) so that the fat can drip down.


It was a relatively quick roast** but still allowed time for the obligatory Ellis Family Run around Dulwich Park while it was cooking (we're not eccentric, we're just strange, as my Granny always used to say). About 3 times during the cooking you can drain the fat away and pour it over the roast potatoes - it makes the most deliciously crispy golden roasties in the world. I put the potatoes in the oven at the same time as the bird, so that had time to cook nice and slowly. I put a wee bit of oil on to start with, but then added the duck fat once the bird started cooking.


The other joy of this duck purchase was that it included giblets - wonderfully underrated organs that make the most delicious gravy. Just bring to the boil in some water with a carrot, an onion, black peppercorns and a bay leaf and simmer for at least an hour and a half. Then pour thorough a sieve into another pan and use as the basis for your gravy. I just added some duck fat, fried up some more carrot and onion and then liquidised.


Finally, I knew that duck works well with plum. We happened to have two rogue plums in the cupboard. We had also just bought some delicious English russet apples. So I peeled and chopped the fruit, and brought to the boil with a bit of water (approx 200ml), a splash of cider vinegar, a cinnamon stick, 1/4 teaspoon ground cloves and 1/2 a teaspoon of ground ginger. I kept the plum stones in as I knew from my jam making experience that this would help it thicken and set. I simmered it for about 15-20 minutes until gorgeously sticky. I was especially pleased with this creation as I usually rely on recipe books. I decided that this concoction was probably a confit, although I realise this probably just means that I have been watching too much Masterchef.


I served the juicy duck with the crunchy potatoes, purple sprouting broccoli, the creamy gravy and sweet confit.


Empty plates all round, and a nod of approval from the Mother. Phew


Jules xx


*I have clearly been watching too much Masterchef

** Preheat the oven to 230C, cooking time is 1hour 50 mins for a 1.8kg duck. Leave to stand for 20 mins before carving.

Thursday, 4 November 2010

Perfect Pud for Autumn - Poached Pears in Red Wine.

Love pears - these ones were for Charl and Matt x

I made this as the dessert for Charlotte's birthday meal. After Rachael's deliciously rich and creamy garlic tart (our last post), I felt the need for a lighter pud. I have to say, this dessert surprised me - how can you make pears in red wine taste like anything other than pears in red wine? Well, by infusing them for hours in a sweet, spicy, warm liquid so that it soaks through the flesh and transforms the humble pear into a succulent, delicately flavoured morsel of delight - that's how!

It's a fairly easy pud to make. However, you do need to prepare the pears the night before - trust me, it's worth it as it means that the pears are entirely soaked through and also frees you up to make the main course/starter when it comes to the day.

One downside to this dessert - if you have a foodie who is somewhat impatient hanging around (aka Charlotte), they can become a bit whiney. Charlotte arrived home from her romantic birthday meal with Matt (at St John, no less - if you nag her she'll do a review), by which point the smell of mulling wine had transfused the house. Cue the whining. No Charlie, I know it's your birthday today but you really do have to wait until tomorrow. And then, after she had tasted the fruit, the whining intensified: Ju - leeeene! When are you going to make those pears again? When?

Well, it's lucky Charlotte's got such a pretty face. It just so happens I can't resist the English pears that are in the shops at the moment, and have some stowed away in the cupboard. Maybe if she's a good girl at the weekend…Jules xxx

This recipe below is based on a Heston Blumethal - but with unnecessary fancy bits taken out. It is the only Heston recipe I have ever made, as I generally consider him to be out of my culinary league… but do not fear, this one really is quite easy.

Pears poached in red wine

You will need a casserole large enough to fit the pears in one layer.

Serves 6-8

8-10 ripe pears (allow 1-2 pears per person depending on their size)

1 bottle red wine

200ml crème de cassis

(NB I didn't have any creme de casis, but I did find a random cherry liqueur in the cupboard that seemed to work very well! If you don't have any appropriate booze, use an extra 100g sugar)

200g sugar

1 cinnamon stick

6 cloves

1 star anise

zest of 1 orange and 1 lemon

Bring the wine to a boil, flame it to reduce some of its acidity and add all the other ingredients.

Meanwhile prepare the pears. Peel them and remove the core so that they will cook evenly the whole way through. To do this, insert the tip of a normal peeler into the base of the pear, just on the edge of the core, push it into the fruit and turning the peeler around the core, cut it out.

The liquid will have cooled down a little. Place the pears side by side and top with a disk of greaseproof paper, the diameter of the pan, with holes pierced in it. Press down slightly so that some of the poaching liquid comes through the holes made in the paper, keeping the pears submerged during the cooking. If the liquid does not cover the pears, add a little water until it does.

Place the casserole back on the heat and bring the liquid to a simmer. As soon as this happens, turn the heat down and cook at a very gentle simmer, just enough to form the odd bubble on the surface of the water.

Cook until the pears are done; you can test this by inserting a small pointed knife into the flesh. If it goes in with little resistance, they are ready. Remove the pan from the heat and leave to cool. When cold, carefully transfer the fruit to a sealable container. If you have added some extra water now reduce the liquid to the required consistency and taste.

Pour the liquid over the pears in their container and store in the fridge for at least one day. The pears will keep for a week in the poaching liquid. Serve hot or cold and adjust the consistency of the liquid as required.

Monday, 25 October 2010

Sweet Autumn Fennel

Sweet Autumn Fennel by Charlotte

Fennel is a top ingredient that should not be confused with celery (for those of you who are strongly against the long stringy stuff). The first time I tried fennel was in Italy, eaten raw and dipped in oil with salt and pepper, which I highly recommend. Last year we had a spate of making a roasted fennel and chestnut side dish - this is also a great dish and in season right now. Maybe go for peeled chestnuts as peeling lots can really test your willpower.

This recipe is taken and adapted from the first Ottolenghi cookbook and has been made twice and tried and tested by lots of friends, who expect a good spread when they come round. Instead of making it in one large baking dish I opted for small ramekins as both occasions were a wee bit special and I decided individual pots were in order. 

Serves 10
Ingredients:
4 fennel bulbs
3 tbsp olive oil
Sprigs of thyme, about 6
3 garlic cloves, crushed
1 tsp black pepper
200ml whipping cream
100g Parmesan, grated
300g cherry tomatoes, tasty ones
Crumble top:
100g plain flour
2 heaped tbsp golden caster sugar
65g cold unsalted butter, cut into cubes

Method:
- Mix the flour and sugar and rub in the butter to make a crumble topping.
- Preheat the oven to 200 degrees.
- Trim the fennel and slice into  small pieces, place in a bowl with the olive oil thyme leaves, garlic, salt and pepper and mix together.
- Put a small amount in each ramekin, divide the cream and pour over the fennel in the 10 ramekins.
- Mix the crumble topping with the grated Parmesan and sprinkle over the fennel.
- Cover each ramekin with foil and bake in the oven for 40-45 minutes.
- Remove the foil, arrange 3-4 tomatoes on the top of each ramekin and bake for a further 15 minutes. 


Thursday, 2 September 2010

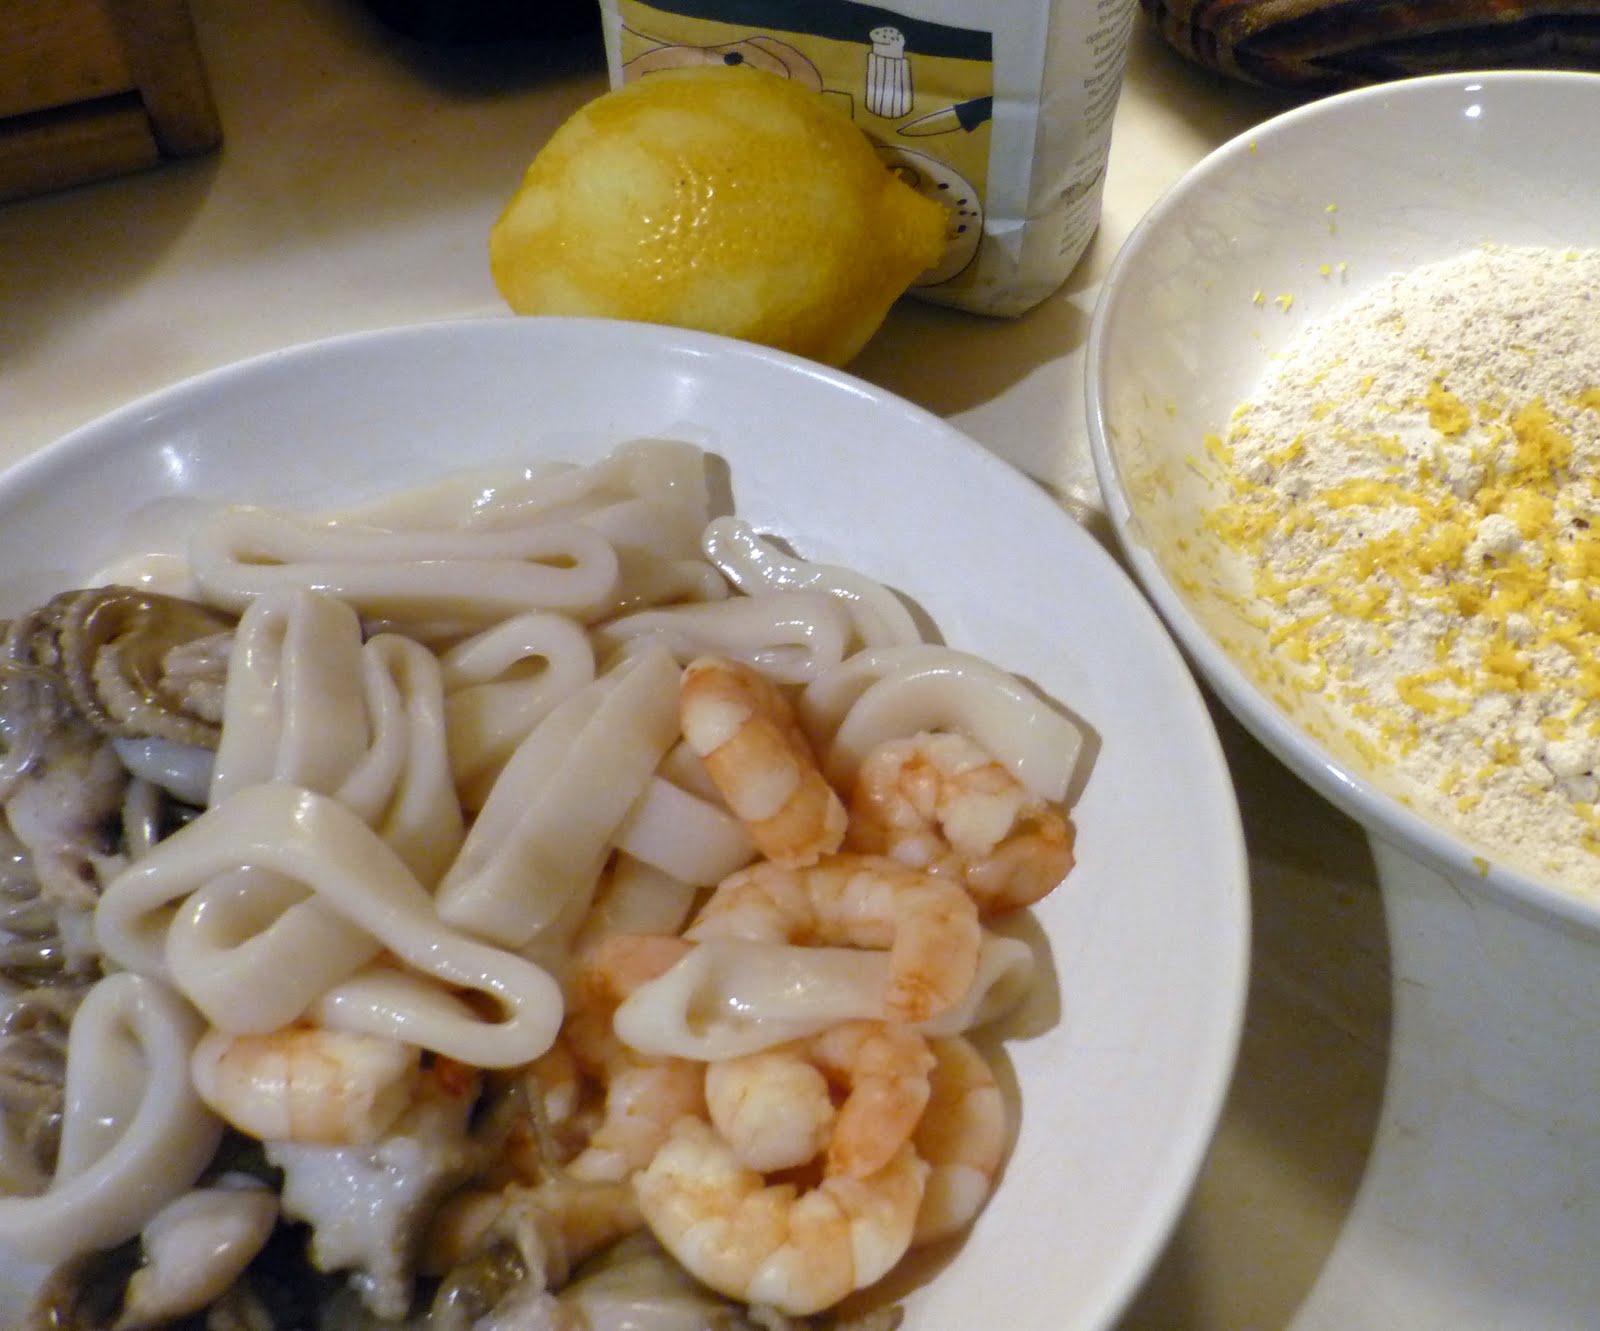
I Heart Italia: Fritto Misto!


by Charlotte

I first discovered fritto misto on the east coast of Italy in 2004 and what a discovery it was. For around eight months after the lovely Liz Jones and I cooked up calamari that we got from the Italian equivalent to Lido, the name of which escapes me right now, in our flat in central Bologna. This was a little different to eating a fresh plate of deep fried calamari, prawns and baby octopus on the shores of Marina di Ravenna but pretty darn good. 

It's now 2010 and I happen to work close to WholeFoods - an treat for any food loving girl. The vegetables are displayed in a rainbow fashion and are intermittently sprayed with a fine mist making them irresistible. And the fish department is my idea of Seaworld - with trays of fresh calamari, prawns and octopus at affordable prices (not like all items in the supermarket!)

So, here's the recipe I cooked up tonight for Jules, a housemate after my own heart when it comes to eating fish and seafood. 


Ingredients:
Clamari
Prawns
Baby Octopus
1 egg
Flour
1 lemon 
salt and pepper
salad
Olive oil
Sunflower oil


Method:
Heat a mixture of olive oil and sunflower oil in a wide based frying pan. Coat the seafood in the egg and then dip in a shallow bowl of flour, seasoned with lemon zest (of 1 lemon), salt and pepper.

When the oil is hot put the the coated seafood in the frying pan, coat in oil and cook for a few minutes, tossing to make sure everything is cooked through.

Serve with salad, ideally rocket and wedges of lemon. Enjoy.


Saturday, 23 January 2010

Chocolate & Ginger Soufflés

Jules's birthday delights
by Charlotte 

Right now it's all about the soufflé. How it started was a conversation between Jules and myself discussing soufflés and the fact that neither of us had ever made one and also the fact that they were meant to be hard and likely to go wrong and disappoint - I don't like to be disappointed, especially in the kitchen. Anyway, Jules went away to find some sun and while gone the Saturday Guardian magazine turned up with none other than a section on soufflés by Hugh Fearnley Whittingstall. He made it sound pretty simple and so I decided this had to be the dessert of choice for her birthday meal (a few days later).

Little did I know that en route to finding the sun Jules had picked up the same magazine and brought it back to show me. So, the night of the birthday meal there were soufflé recipes all over the kitchen!

Rach arrived with pink sparkling wine. Matt (ham enthusiast, formerly known as pizza oven enthusiast) turned up with some more pink sparkling, as did Ceri! This was drink of choice in 2009 and seems to be rolling over into 2010 which is only a good thing. Birthday guests assembled in the form of Charmy, cousin Louise and Rob and we tucked into Nigel Slater's quince jelly twice cooked ham with baked sweet potatoes and braised leeks and asparagus. Suddenly I realised that it was late, 10:30pm to be precise so we decided to do a pudding poll which was a unanimous 'yes' when I mentioned chocolate and ginger soufflés. I hadn't started making them as you need to have ingredients like butter and eggs at room temperature, make, bake and then eat them straight away before any unfortunate deflating occurs!

So, I followed Hugh's instructions word for word, melting the chocolate and finally folding in the well beaten egg whites (thanks to ham enthusiast) before placing them in the hot oven - hot is key! We then waited patiently for 9 minutes while they cooked and rose - you're not allowed to open the oven and check so for me this was a particularly tense moment and I did prepare myself for the worst, telling everyone that they would probably not work. So when I opened the oven and saw 8 perfectly risen balloons of chocolate I was overjoyed, as was everyone else. There was one slippery moment when Ceri and I almost dropped the baking tray with the ramekins on, which someone managed to capture on camera. The end result can only be described as a mouth wateringly rich, hot mousse with cake like texture around the side, light and delicious. Here are the finished delights, and despite the holding of the breath when I opened the oven door all was well. The recipe was easy to follow and I recommend baking sweet or savoury soufflés if you want to impress anyone, including yourself. Thanks Hugh!

Best served (a new feature on all Charlotte posts) with a round of applause and some sparkling pink fizz.
   

Chocolate and ginger soufflés

Melting, dark chocolate is given a bit of a kick with fiery ginger to make for a decadent pud. Serves eight.

20g unsalted butter, softened, plus more for buttering the ramekins
75g caster sugar, plus 3 tbsp for dusting the ramekins 
225g 70% cocoa dark chocolate, broken into pieces
80ml whole milk
3 eggs, at room temperature, separated
20g stem ginger, drained and very finely chopped, plus 1 tbsp syrup from the jar of stem ginger 
1 egg white, at room temperature
Pinch of cream of tartar
200ml whipping cream

Heat the oven to 190C/375F/gas mark 5. Butter eight 140ml ramekins and dust with the three tablespoons of caster sugar. Melt the chocolate, butter and milk in a heatproof bowl over a pan of barely simmering ­water. Stir until smooth, remove from the heat and beat in the egg yolks. Stir in the chopped ginger.

In a clean bowl, beat the egg whites and cream of tartar until foamy and forming soft peaks. Gradually beat in the sugar until the mixture forms firm peaks when you lift out the whisk. Fold a third of the egg whites into the chocolate mixture to loosen, then carefully fold in the rest. Divide the mixture between the ramekins, filling them to the top, then run a knife or thumbnail around the edge to help them rise. Place the ramekins on a baking sheet and bake for eight to 10 minutes, until risen.

While they're baking, whip the cream until thickened and stir in the ginger syrup. Serve the soufflés as soon as they come out of the oven, with some ginger cream on the side.